Construct Rendering Modes
PBR, Environment-lit PBR, and progressive Path Tracing in the Construct viewport
Construct Rendering Modes
Status: Complete Last Updated: 2026-08-26
The Construct viewport supports several shading modes, each with different speed / quality tradeoffs. The active mode is the Shading mode setting in the Shading category of the settings window (Ctrl+,). With Write to: Scene it is saved with the document. A camera can override it, so one shot can be path traced while the rest of the scene stays cheap to edit — see where settings live.
Modes
| Mode | Description | Best for |
|---|---|---|
| PBR | Baseline forward shading — direct lighting + roughness/metallic surface response. | Modelling, rapid iteration. |
| Environment-lit PBR | PBR plus environment-sampled ambient and reflections. Reads the active environment (§RRD-8, internal construct-realistic-rendering spec). | Most editing sessions; visually correct without the cost of accumulation. |
| Path Traced | Progressive Monte-Carlo path tracing — converges to a noise-free image over multiple samples. | Final-look review, marketing renders, lighting validation. |
Switching shading mode triggers a one-time pipeline compile on first activation; subsequent switches reuse the cached pipeline.
Path Tracing
Path-traced rendering accumulates light samples over many frames. Each new frame deepens the image and reduces noise; camera or scene edits restart the accumulation from scratch.
What you see while it warms up
When you switch to Path Traced (or open a scene whose saved mode is Path Traced), the worker thread compiles its pipelines. Until the first sample lands, a small pill appears at the bottom-right of the viewport:
Compiling path tracer…
During this window the viewport continues to show the rasterized (Environment-lit PBR) preview so you can keep working. The wait is the pipeline compile, which the SPIR-V cache removes on later activations. Once the tracer runs, one sample costs about 13 ms at 1280×720 on the RADV test machine (2.6 ms at 64×64), so the sample counter climbs at the worker's 30 Hz tick until the budget is reached.
If the worker cannot come up (no Vulkan driver, a backend without storage buffers, a resource the device refuses), the pill shows the worker's own reason:
Path tracer: accumulation texture 0 create failed — using rasterized preview
In this state the viewport stays on the rasterized preview. Path-traced output is not available on that machine; everything else (selection, materials, export) continues to work normally.
Sample progress
Once results start arriving, a second pill appears below the (now-hidden) compile pill:
N samples
The number ticks up each frame the worker produces. Path tracing is convergent — more samples mean less noise. A noise-free image typically needs 256–2048 samples depending on scene complexity, lighting, and materials.
The Path tracing settings
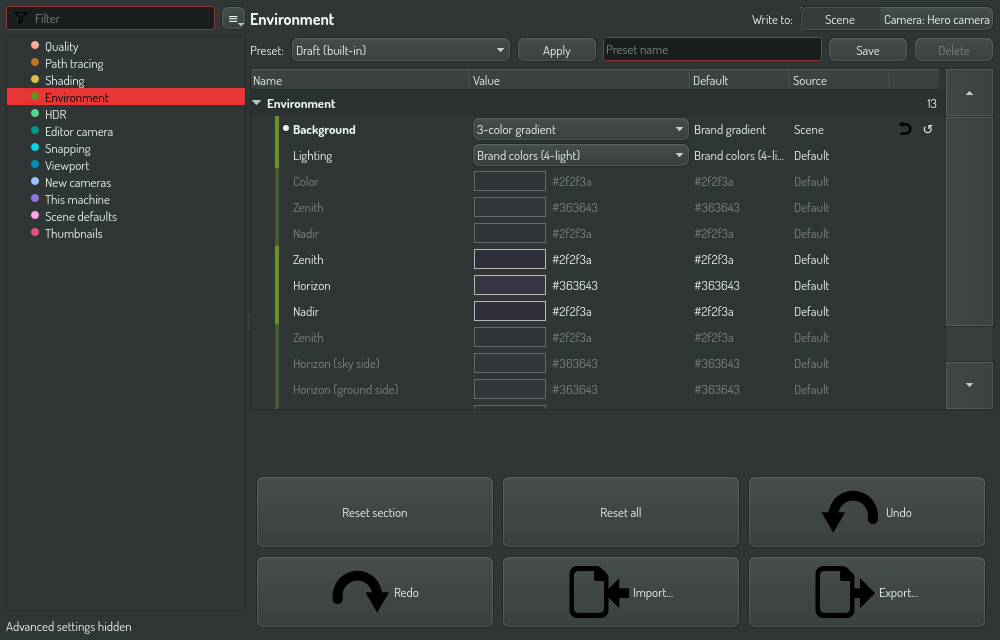
The settings window has a Path tracing category beside Quality. It holds the sample cap (Max samples), the bounce depth (Max bounces), the secondary march's step count and hit tolerance (Secondary steps, Secondary epsilon), the traced resolution as a fraction of the viewport (Render scale), and two export-only values, a time budget per frame and the samples per submit. They cascade like every other rendering setting: the scene holds a default, a camera can override it, and a render preset carries it into an export. An export at N samples matches the viewport at N samples.
When accumulation resets
Accumulation resets (sample counter returns to 1 on the next result) whenever the source of light or geometry changes:
- Camera moves (orbit, pan, dolly, look-at change)
- Scene structure changes (add / remove / rename / re-parent any item)
- Instance parameter changes (diameter, transform, smooth radius, …)
- Material edits
- Environment or lighting changes
- Any change in the Path tracing category of the settings window (samples, bounces, secondary march, render scale) or a rendering-mode change
Accumulation does not reset on:
- Mouse hover (selection highlight uses a separate readback path)
- Click / drag selection
- Window resize that doesn't change the rendered viewport size
- UI panel toggles or splitter drags
Material editor preview
When the main viewport is rendering path-traced, the material editor's preview substitutes Environment-lit PBR to keep its preview responsive and stable. Materials, environment, and tone mapping are identical to the main viewport's; only the sampling path differs. At the small preview size the visual difference is negligible.
If you want a fully path-traced preview at high quality, look at the main viewport — it accumulates against the actual scene composition.
Speed considerations
Path-traced rendering moves to a worker thread on its own QRhi (Vulkan); editor interactions (panel resize, splitter drag, scene-tree edits) no longer block on the path tracer's GPU work. Specifically:
- Splitter drag during path tracing no longer interrupts the worker's accumulation.
- The viewport keeps working while a render job runs, sharing the GPU. Pause the viewport while a render job runs, in the This machine category of the settings window, gives the job the GPU to itself instead.
- A render job runs at a lower thread priority and submits its GPU work in short pieces, so the desktop stays responsive while it renders.
- Recent renders shows each job's last rendered frame as a thumbnail (black until the first frame lands). Click it to view the frame full screen. A click or any key closes the view.
- Quitting while a render runs asks first: finish rendering and then quit (the app stays open until the job ends and closes itself), abort the render, or cancel.
- A running render has a pause/resume button and an abort button beside its progress bar. Pause holds the render between GPU submits and resumes where it stopped. Abort asks first and keeps the frames written so far.
- An exported frame stops at the sample ceiling or after the time budget, whichever comes first. The default budget is ten seconds per frame. The job log reports every quarter of a frame's budget and the stop reason for each frame.
- Switching shading mode returns immediately; the worker compiles in the background.
- Toggling panels open / closed doesn't pause sampling.
A single worker thread serves the main viewport. The material editor's preview uses a separate (rasterized) pipeline.
Camera projection
The editor camera draws in perspective (the default) or orthographic, chosen with Orthographic in the Editor camera category of the settings window. It is a scene setting, saved with the document. There is no machine-wide default for it, because a projection that depended on whose computer opened the file would make one model look like two.
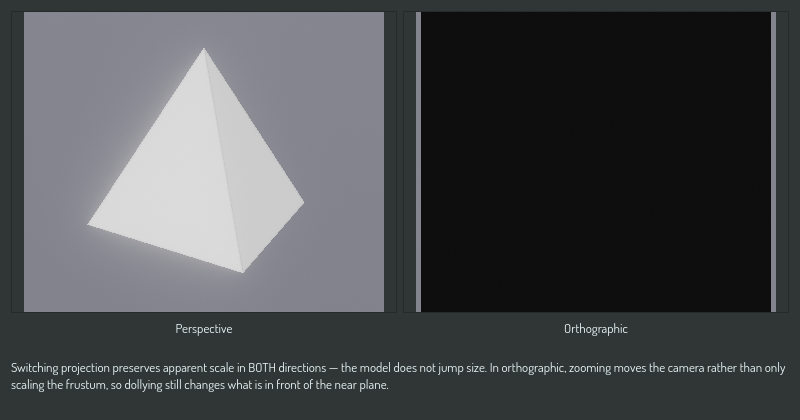
Switching projection preserves apparent scale, in both directions. The model is the same size on screen immediately after the switch as it was immediately before. Going to orthographic, the frustum takes its height from the camera's distance to the target; coming back to perspective, the camera distance takes its height from the frustum. Earlier builds derived this only on the way in, so switching back restored a distance from before you had zoomed, and the model jumped to an unrelated size.
Orthographic zoom moves the camera; it does not only scale the frustum. The wheel dollies the eye and rescales the frustum together, so the scale match with perspective holds continuously rather than only across a switch. It is also what lets you zoom back out of a model you have zoomed into: scaling the frustum alone left the eye where it was, and a camera that ended up inside the geometry had no way out.
An orthographic projection has no perspective divide, so — unlike perspective — its near plane may sit behind the camera, and here it deliberately does. That is what keeps the near half of a model visible once the camera is inside it, instead of clipping it away.
Ray-marching settings
Under Options → Ray-marching quality. These govern how the renderer walks a ray toward a surface; the practical guide to using them is Ray-marching quality.
| Setting | What it does | Default |
|---|---|---|
| Algorithm | Which marching strategy runs. The list is the shipped tracer records, not a fixed menu — a new strategy appears here as data. Auto resolves to the measured best general default and hands the step budget to the scene. | Auto |
| Max steps | Ceiling on how many jumps one ray may take before giving up. A ray that runs out stops, and the surface behind it is not drawn. | 128 |
| Max ray distance | How far a ray travels before it is declared a miss. Must exceed the distance from the camera to your geometry, or nothing is drawn regardless of the other settings. | 10000 |
| Ray epsilon | How close counts as "arrived". Smaller places the surface more precisely and costs more steps. | 0.001 |
| Step scale | Fraction of the reported distance each jump takes. Below 1 is a safety margin against shapes that overstate distance. | 0.8 |
Auto and the step budget
Every shape in the library carries a measured figure for how much it can overstate distance. Auto folds those over the shapes a scene actually uses and derives two things from the result:
- a shorter step, so a jump cannot pass through a surface that lied about being further away;
- a higher step ceiling, because a shorter step needs more of them.
A scene of exact shapes folds to 1 and gets the plain defaults — Auto costs nothing there. Selecting a strategy explicitly hands the step scale back to that strategy (it is the strategy's own business how far to jump) while the ceiling still follows the scene, since running out of steps loses geometry no matter what chose the step length.
Per-strategy settings
Selecting a strategy other than Auto reveals its own settings beneath the picker, generated from that record — a Lipschitz floor, a cone threshold, a rewind factor, depending on which one. The defaults shown are the values the benchmark measured, so a strategy starts at its best-known tuning rather than at zero. See Render Lab for where those numbers come from.
Debug views
Options → Debug view → March diagnostics replaces the shaded image with what the march did: red for budget spent, green for how often the shape overstated its distance, blue for why the ray stopped. It is the first thing to look at when geometry is missing.
Rendering is not evaluating
Everything above is about rendering — turning the scene into pixels on screen, on the graphics card. Mesh export does something different: it evaluates the scene, asking "how far is this point from the surface?" at millions of points, and it does that on the CPU.
The two are separate machinery with separate settings, and the names look alike enough to mix up:
| Rendering | Evaluating | |
|---|---|---|
| Produces | The picture in the viewport | A triangle mesh file |
| Runs on | The GPU, always | The CPU by default |
| Chosen in | Shading mode in the settings window (this page) | Mesh export evaluator in the This machine category of the settings window |
| Options | PBR, Environment-lit PBR, Path Traced | Native, GPU, Interpreter |
So the export dialog's three choices are not the three modes on this page, and switching one does not affect the other. If you are looking for why an export is slow, or why an export failed, that is the evaluator — see Export a mesh.
For the record: the CPU evaluator is an interpreter over the scene's own expression tree. Older documentation described it as a "SPIR-V interpreter"; that was accurate for a component the app no longer contains, and the name survived the thing.
Related
- Export a mesh — the evaluator, which is not a rendering mode
- Ray-marching quality — diagnosing missing geometry
- Render Lab — where the defaults were measured
- Material System — material properties consumed by every rendering mode
- Scene Organization — how items contribute to the rendered output