Turn an SDF scene into a triangle mesh file
Export a mesh from Construct
You've built an SDF scene in Construct and want a triangle mesh file (STL, OBJ, PLY, VTK) — for printing, simulation, or another DCC tool. Pick the algorithm below, then follow the walkthrough.
This is a landing page
It lists the extractor choices so you can pick the one that fits; the actual UI walkthrough (with screenshots) lives on Choose export quality.
Pick an algorithm
| Algorithm | When to use it |
|---|---|
| Adaptive Dual Contouring | Default. Preserves the sharp edges and corners your SDF defines, and spends triangles only where the surface needs them — flat areas collapse to a handful of triangles. |
| Dual Contouring (uniform grid) | Same crisp edges on a uniform grid — predictable triangle budget, useful when downstream tools expect evenly-sized triangles. |
| Marching Cubes (legacy) | The previous exporter. Rounds off sharp features into a staircase at any finite resolution; kept for comparison and for workflows tuned to its output. |
Whichever you choose, the Finish selector runs a post-process chain after extraction — every mode preserves sharp features and watertightness:
- Uniform surface snaps vertices onto the exact surface, then remeshes to an even triangle density (print/CAD-grade). This is the default.
- Lightweight snaps, merges flat facets and decimates to roughly half the triangles (viewport/web-grade).
- Raw extraction skips post-processing.
- Custom chain… shows an editable step line, for example
weld,sdfProject(2),remesh(iterations=5, featureAngleDeg=35). Use it to apply a chain tuned in Mesh Lab's parameter sweeps — its Copy chain string action pastes straight in. A typo is flagged at the field before anything runs. The step names and parameters are listed in Mesh tuning parameters.
With Adaptive Dual Contouring, two more fields appear: Adaptive refinement (let the octree merge cells where the surface is flat; on by default) and Residual tolerance (how much fit error a merged cell may carry — Auto derives it from the cell size). Both also exist headless, as --adaptive-octree and --residual-tolerance on construct export.
Pick an evaluator
The algorithm above decides how the surface is turned into triangles. The evaluator decides who computes the shape in the first place — it is the part that answers "how far is this point from the surface?", thousands of times per triangle.
| Evaluator | When to use it |
|---|---|
| Native (compiled) | Default, and what you want. Your scene is compiled to machine code in memory and run directly. Nothing needs to be installed — the compiler ships inside the app. |
| GPU | Runs the same scene on the graphics card. Not always faster: mesh export moves a lot of data back to the CPU, and that transfer usually costs more than the calculation saves. Unavailable on machines without a suitable driver. |
| Interpreter (CPU) | Executes the compiled program step by step instead of turning it into machine code. Tens of times slower per sample, and much quicker to prepare — so it is what you want for comparing against Native when a result looks wrong, and not what you want for a large mesh. |
All three now compile your scene with the same compiler and differ only in what happens to the result afterwards — executed step by step, turned into machine code, or dispatched to the graphics card. That is why they agree: it is one program with three destinations rather than three implementations of the same language.
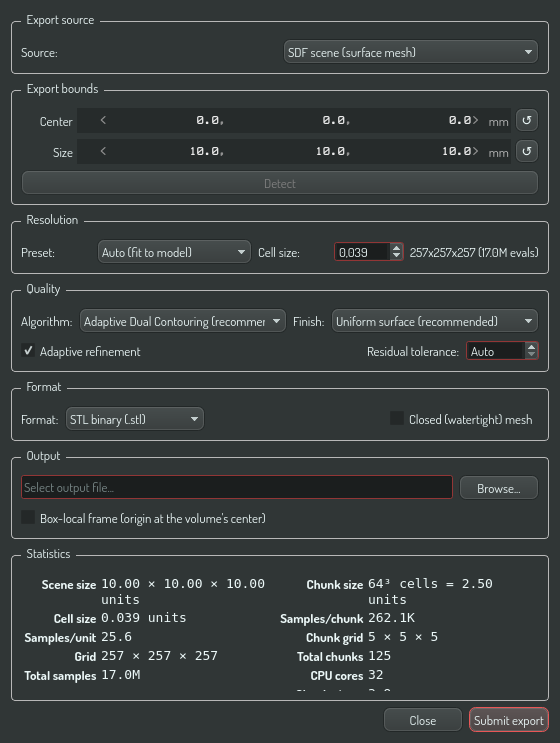
You can leave this alone. The default is Native everywhere — in the app, on the command line, and for automation — and they all produce the same mesh.
Where the setting lives. The evaluator is a property of your machine (which compiler and which graphics card it has), not of any scene — so it is set once under This machine in the settings window (Ctrl+,), and the export dialog shows the current choice read-only.
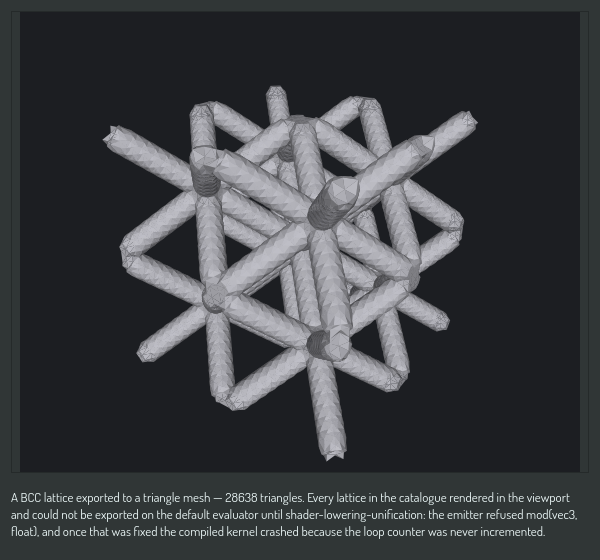
Lattices are the shapes this matters most for. They are defined by repeating one cell through space, which is cheap to draw and demanding to evaluate — and until recently they could be shown in the viewport but not exported on the default evaluator.
Set the export bounds
The export only looks inside a box. Everything outside it is simply not exported — so a box that is too small quietly clips your model, and one that is far too large spends the whole triangle budget on empty space.
Bounds live in the scene now, not in this dialog. The box is a bounding volume — a named scene item you can see, drag, parent and rotate, and re-use for one-click export. The dialog edits the active volume's box; if the scene has none, a temporary volume is created for the export so nothing blocks. Where the box cuts through your model, the mesh gets a clean flat face — including along tilted faces of a rotated volume.
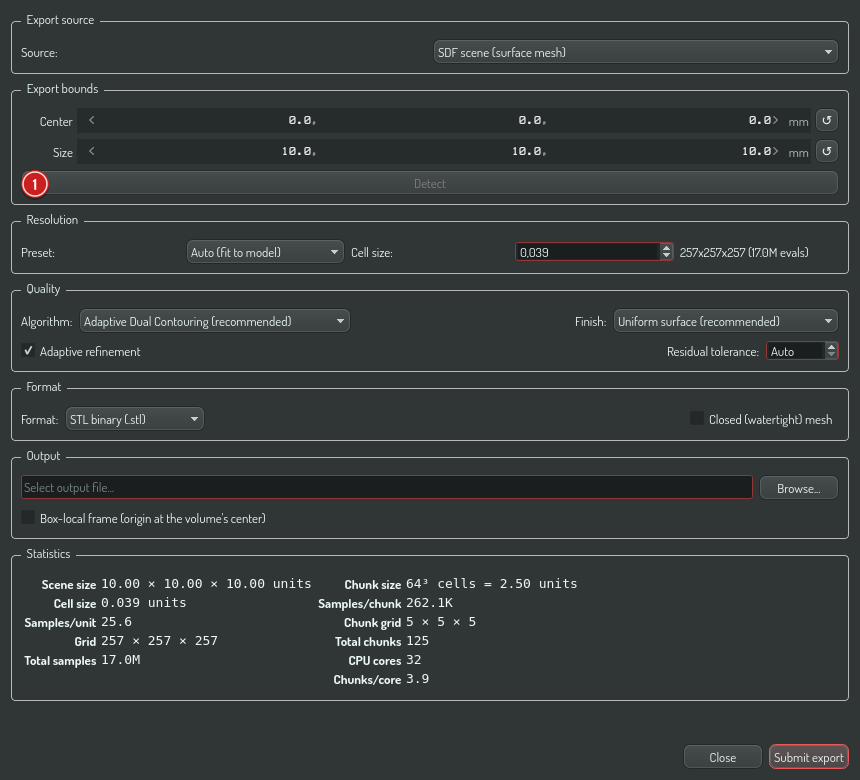
The Export bounds group in the export dialog is where that box is edited, and next to it is a Detect button. Press it and Construct finds the box for you: it samples your scene's distance field, walks outward until it stops finding surface, and narrows in on where the surface actually ends. It reports how long it took and how many samples it used when it finishes.
Use Detect whenever you are unsure. It is the right default, it takes a moment rather than a coffee break, and it is far more reliable than reading coordinates off the viewport by eye.
A few things worth knowing:
- The detected box is deliberately a little larger than your model. A small margin is added on every side, because a box that ends exactly on the surface tends to shave the outermost sliver off it.
- Detect measures what is there, not what you meant. A stray shape far from the rest of your scene is still part of the scene, and the box will grow to include it — which is usually the first sign that the stray shape exists.
- Very large scenes are handled. If the search reaches its limit without finding an edge, it widens the search and tries again rather than reporting the half-size box that a fixed limit would produce.
- An empty region detects nothing. If the box comes back unchanged or the result looks wrong, check that the scene actually contains geometry near the origin before adjusting numbers by hand.
You can always type the six numbers yourself. Detect is a starting point, not a lock — adjust the values afterwards if you want to export only part of a scene.
Exporting a region that is not part of your scene?
If you export using a temporary region, Construct offers afterwards to Keep as scene bounds. Accepting saves that box with the scene so the next export starts from it; declining leaves the scene as it was.
Why an export can fail
If you pick an evaluator by name and it cannot run your scene, the export stops and tells you why. It used to quietly finish on the interpreter instead, which looked like success and took a hundred times longer, so a slow export was indistinguishable from a normal one.
If that happens:
- Just retry without choosing an evaluator. The default is Native, and if something about your scene defeats it you will get the same clear message rather than a silent hour.
- The message names the problem. It comes from the part that could not handle the scene, not from the export machinery, so it points at the shape rather than at the exporter.
- Choosing the interpreter explicitly still works and is the fallback of last resort — it accepts a little more than Native does, at the cost of the speed difference above.
After you've exported
- The export runs as a background job — watch it in the Jobs panel.
- Power users can benchmark pipelines against each other and browse the results visually in Mesh Lab.