Your First Agent
Set up and configure an Agent node
Your first Agent
In this tutorial, you'll set up your first OctoMY™ Agent - the node that runs on your robot.
What you'll learn
- Starting an Agent for the first time
- Understanding the "birth" process
- Configuring hardware (optional)
- Navigating the Agent interface
Prerequisites
- OctoMY™ installed (see Installation)
- A device to run the Agent (computer, Raspberry Pi, or Android phone)
Step 1: Start the Agent
Open a terminal and run:
./agent --personality MyFirstRobot
The --personality flag gives your Agent a name. This creates a separate identity and data directory, allowing multiple Agents on the same device.
Pro Tip
Use descriptive personality names like "KitchenBot" or "GardenRover". You can run many Agents on the same machine, each with its own identity.
Step 2: The birth process
When you start an Agent for the first time, it goes through a "birth" process:
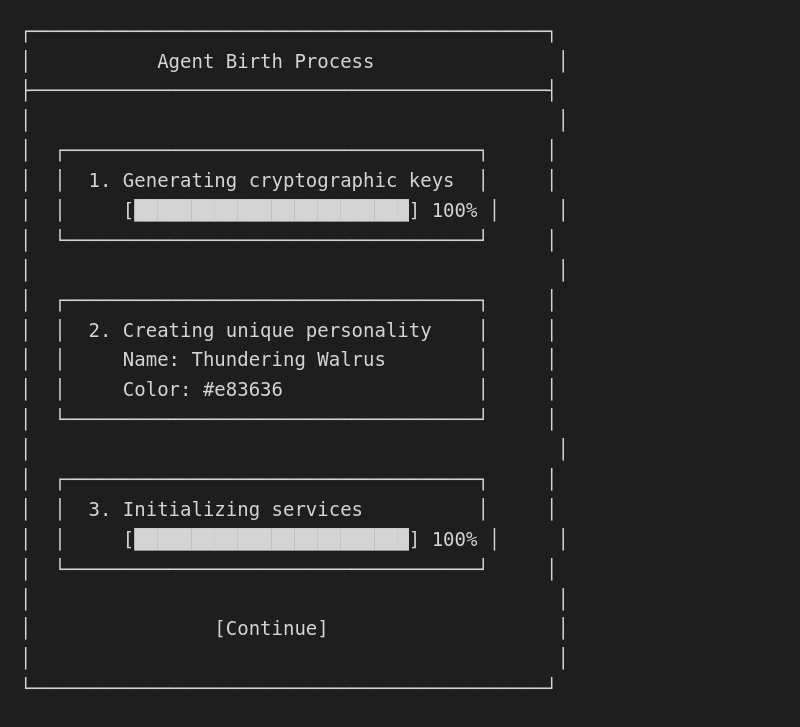
What happens during birth
-
Key Generation: A unique RSA key pair is created. This is your Agent's cryptographic identity.
-
Personality Creation: From your key, OctoMY™ derives:
- A unique identicon (visual avatar)
- A generated name (like "Thundering Walrus")
- Theme colors
- Voice characteristics
-
Service Initialization: Core services start up in sequence.
Did You Know?
The identicon is mathematically derived from your Agent's public key. This means the same key always produces the same identicon - useful for visually verifying identity across devices.
Step 3: Explore the interface
After birth, you'll see the main Agent window:
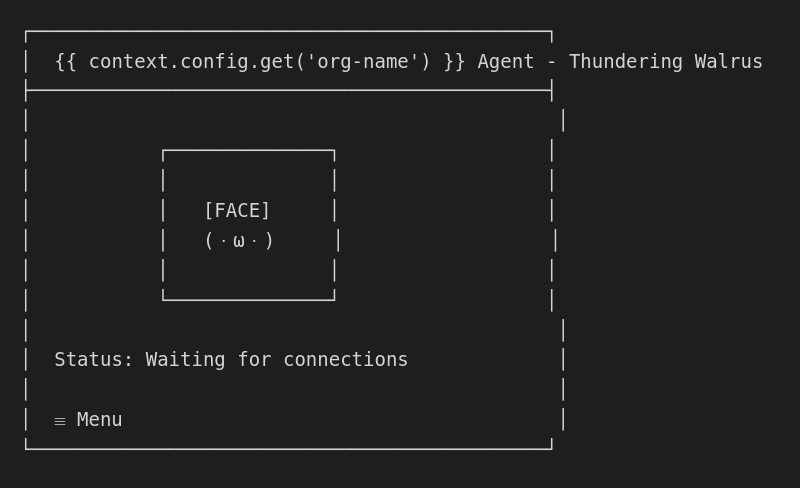
The face
The large face display shows your robot's "expression." This is purely decorative but makes your robot feel more alive.
The menu
Tap the menu icon (☰) to access:
| Menu Item | Purpose |
|---|---|
| Settings | Configuration options |
| Hardware | Actuator/sensor setup |
| Pairing | Connect with Remotes |
| Utilities | Debug and testing tools |
Step 4: Configure hardware (optional)
If your Agent has attached hardware (motors, sensors), configure it now.
Access hardware settings
- Tap ☰ Menu → Hardware
- Select your controller type
Supported controllers
| Controller | Connection | Use Case |
|---|---|---|
| ArduMY | Serial USB | Arduino-based robots |
| Servotor32 | Serial USB | 32-channel servo controller |
| Virtual | None | Testing without hardware |
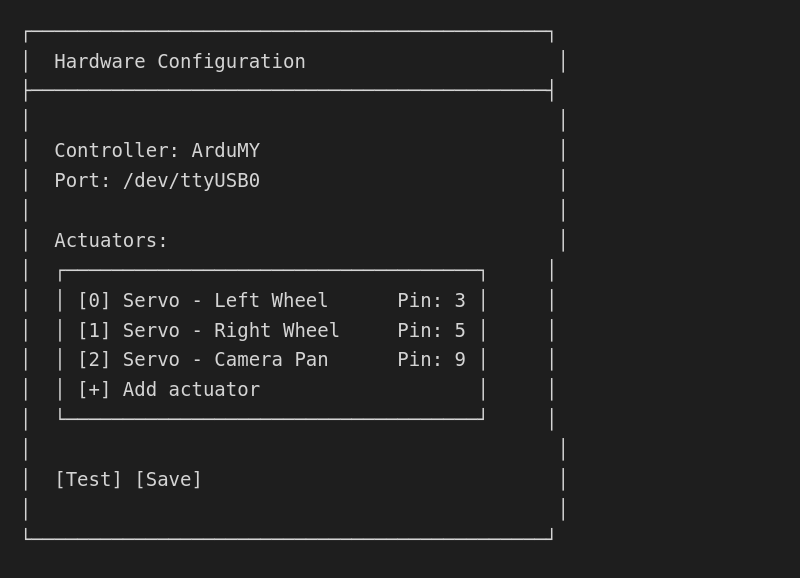
Example: ArduMY setup
- Connect your Arduino via USB
- In Hardware settings, select ArduMY
- Choose the serial port (e.g.,
/dev/ttyUSB0) - Configure your actuators:
Pro Tip
Don't have hardware yet? Select "Virtual" controller to continue learning. You can add real hardware later without losing your Agent's identity.
Step 5: Enable discovery
For the Remote to find your Agent, enable discovery:
- Tap ☰ Menu → Settings
- Enable Auto Discovery
The Agent will now broadcast its presence on the local network.

Step 6: Verify your Agent
Check that your Agent is ready:
Check status
Look at the status bar at the bottom of the window:
| Status | Meaning |
|---|---|
| "Waiting for connections" | Ready, no Remotes connected |
| "1 Remote connected" | A Remote is controlling you |
| "Discovery active" | Broadcasting presence |
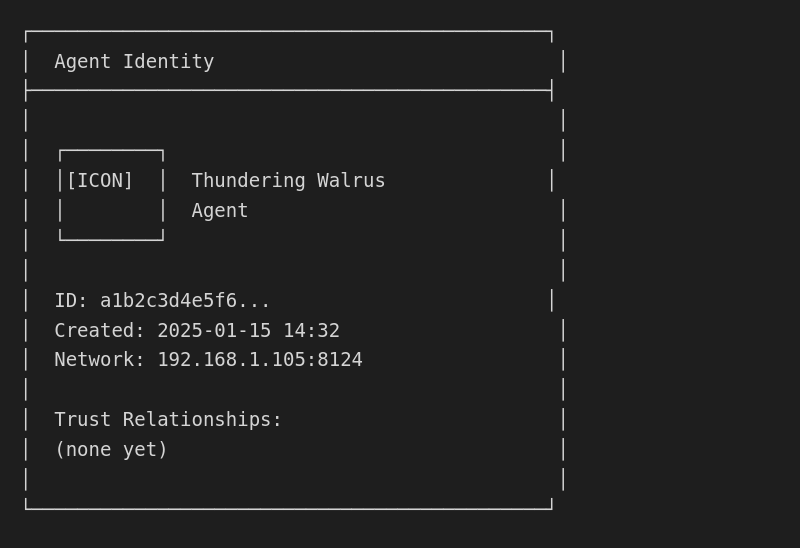
View your identity
Go to ☰ Menu → Utilities → Identity to see:
Troubleshooting
Agent won't start
"Could not bind to port 8124"
Another process is using the port. Either stop the other process or use a different port:
./agent --personality MyRobot --port 8125
Hardware not detected
"No serial ports found"
- Check the physical connection
- Verify you have permission:
ls -la /dev/ttyUSB* - Add yourself to the dialout group:
sudo usermod -a -G dialout $USER
Discovery not working
"No Remotes can find me"
- Ensure both devices are on the same network
- Check firewall allows UDP on port 8124
- Try manual pairing using QR code instead
What you've accomplished
You now have a running Agent with:
- A unique cryptographic identity
- A generated personality
- (Optionally) configured hardware
- Discovery enabled for Remotes to find
Next steps
Your first Remote - Set up a controller for your Agent