Find and change a setting
Open the settings window, filter, read the marks and change a value
Find and change a setting
This guide shows how to open the settings window, find a setting with the filter, read what the row tells you, and change the value. The examples use Construct, but the window works the same way in every app.
Open the settings window
Press Ctrl+,. In Construct you can also click the gear button in the toolbar.
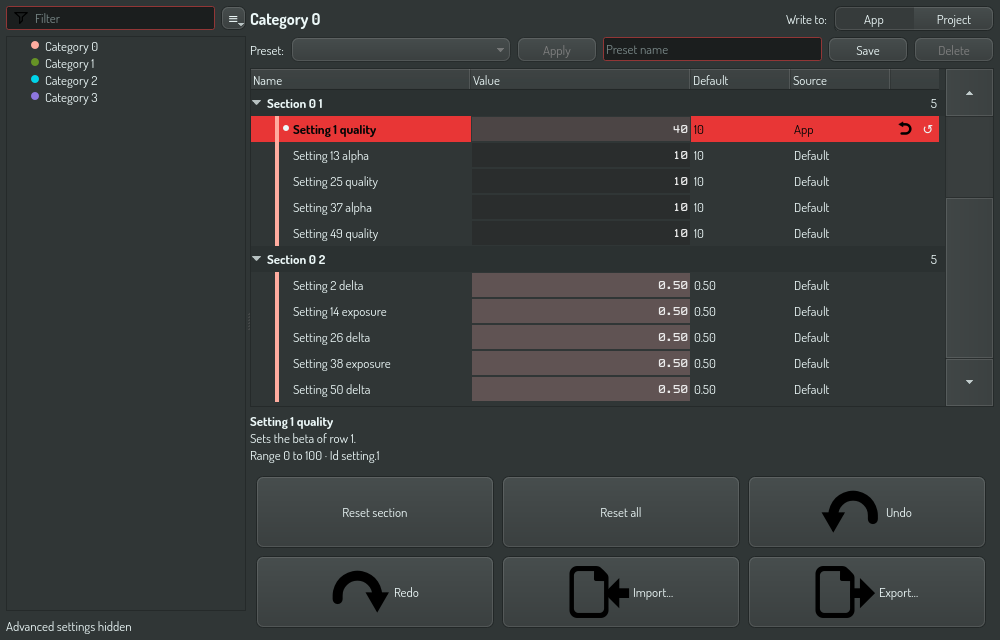
The window has four parts:
- The category column on the left, with the filter field at its top.
- The table on the right, with one row per setting.
- The detail strip under the table. It shows the full description, the range, the unit and the id of the selected setting.
- The footer with the buttons that act on many settings at once.
The window title names the app, for example Settings — Construct. The window is not modal, so you can leave it open and keep working in the app.
Find a setting
Click a category in the left column to show only that category. Or type in the Filter field:
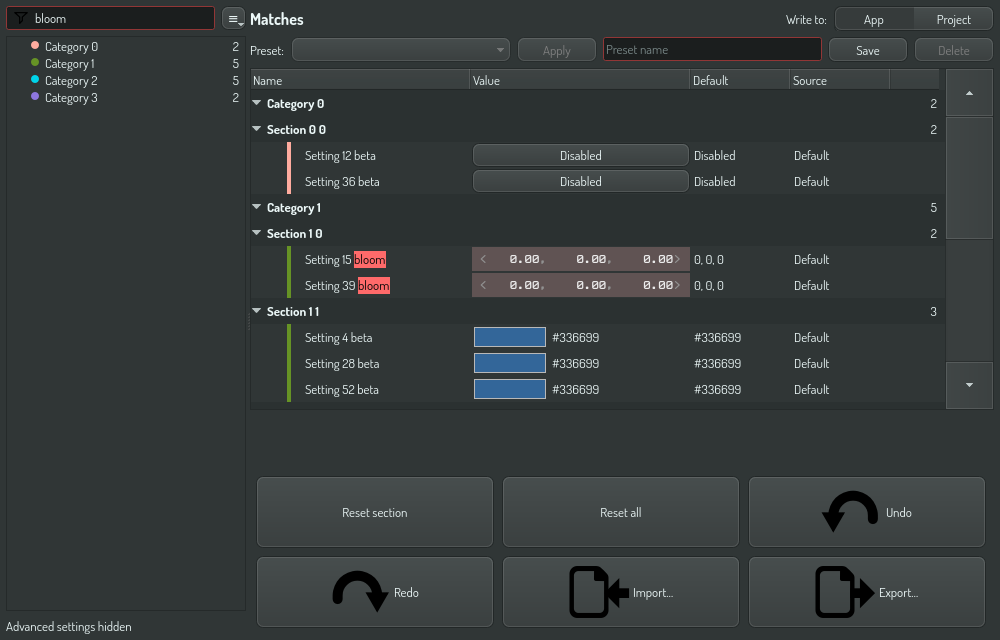
- A setting matches when every word you type occurs in its label, its description, its id or its category name. Case does not matter.
- The table shows every match from every category, and the matching text is highlighted.
- A category with no match leaves the left column. A category with matches shows how many it has.
- Click a category while the filter has text to narrow the table to that category. The filter text stays.
The filter responds as you type, so there is nothing to confirm. These keys help:
| Key | Does |
|---|---|
| Ctrl+F | Moves the focus to the filter field |
| Any letter, outside an editor | Moves the focus to the filter field and types the letter there |
| Down, in the filter field | Moves the focus to the first match in the table |
| Esc, in the filter field | Clears the filter. With an empty filter, closes the window |
The ≡ button beside the filter has two more choices:
- Changed only keeps only the settings that differ from their default. Use it to answer "what did I change?".
- Show advanced shows the settings that an app marks as advanced. Until you check it, the filter does not find them, and the left column says Advanced settings hidden.
Read a row
A row tells you more than its value. Each mark below has a second sign that does not depend on color.
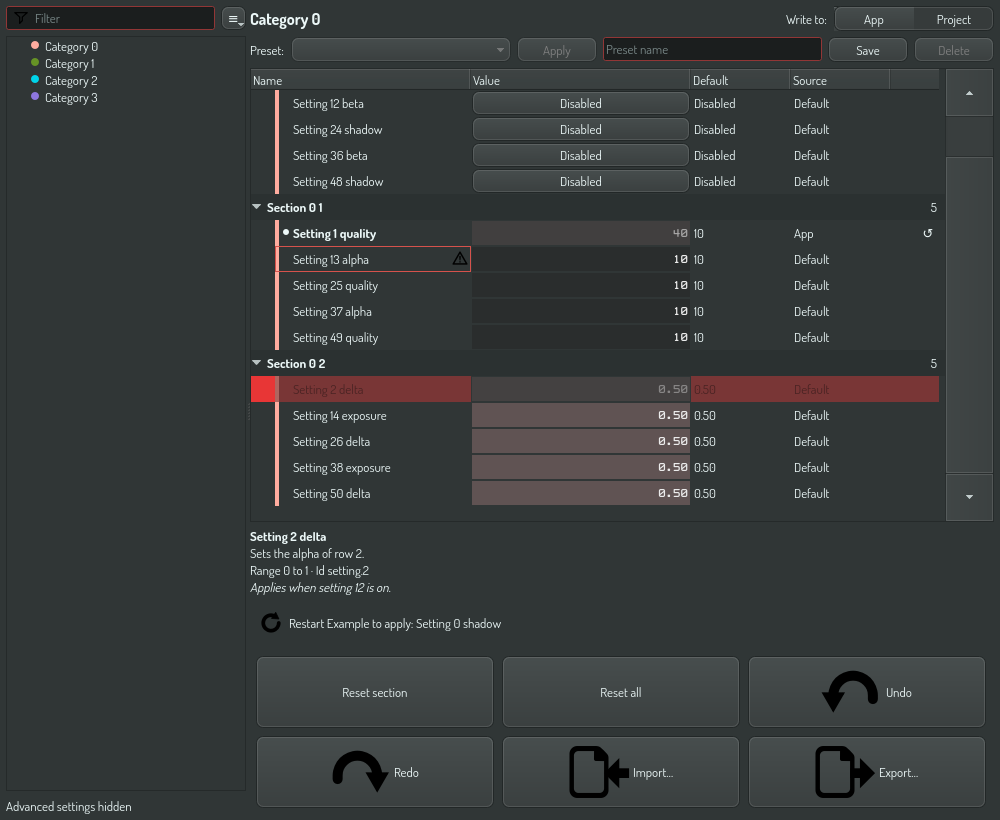
| What you see | What it means |
|---|---|
| The name in bold, with a dot before it | The value differs from its default. The Default column shows the default |
| The value dimmed | The value comes from another level. The Source column names that level |
| The whole row dimmed | The setting does not apply right now, for example a gradient color while the background is flat. You can still change it. The detail strip says why it does not apply |
| A border in the danger color, and a warning icon | The stored value is not valid. The detail strip says what is wrong |
| The name in the warning color, and a banner at the bottom | The app applies the change only after a restart. See Reset, revert and undo |
The colored stripe at the left of a name shows the category the setting belongs to.
Change a value
Each kind of value has its own input. A change applies at once. There is no Apply button and no Cancel button.
| Kind | Mouse | Keyboard |
|---|---|---|
| Number | Drag left or right to change it. Click to type a value | Enter opens the editor. Up and Down step |
| Yes or no | Click to switch between Enabled and Disabled | Space switches |
| List | Click to open the list | Enter opens the list |
| Color | Click the swatch to open the color picker | Enter opens the picker |
| Text, file or folder | Click to type. The browse button opens a file dialog | Enter opens the editor |
| Action, such as Regenerate all thumbnails | Click the button | Space calls it |
Use Up and Down to move between rows. The mouse wheel scrolls the table. It changes a value only in the cell you are editing, so you cannot change a setting by accident while you scroll.
Some settings have hard limits, for example a share that must stay between 0.05 and 1. If you type a value outside such a limit, the window refuses it, the old value stays, and the detail strip says why.
Choose where the value goes
Some apps keep a setting at more than one level. Construct, for example, has a value for new scenes, a value for the open scene, and a value for one camera. In such an app, Write to above the table chooses the level that your next change writes to.
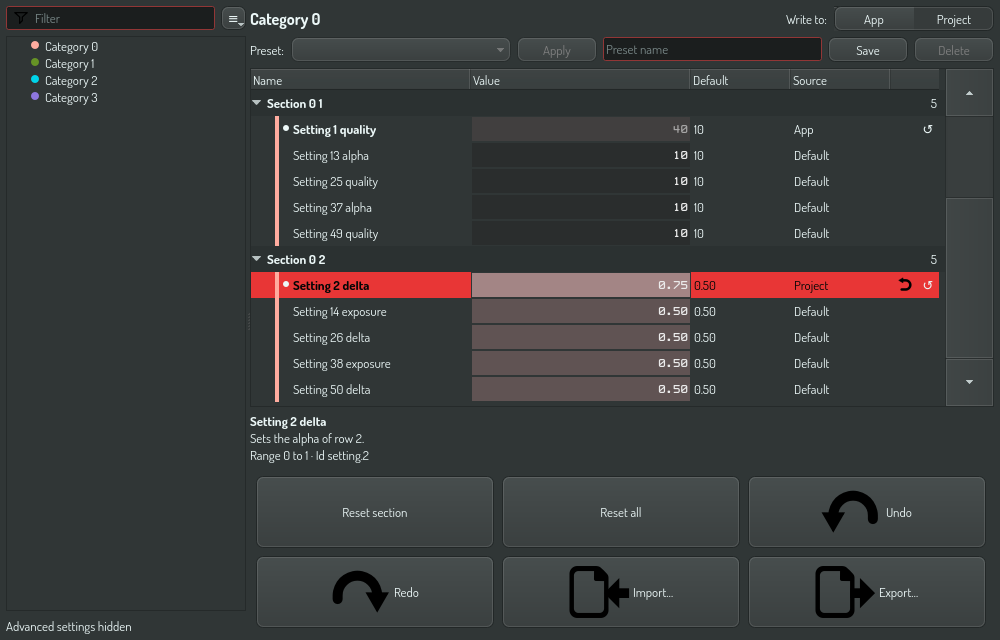
- A value that is set at the chosen level shows at full strength, and the revert button shows beside it.
- A value that is set at a lower level shows dimmed, and the Source column names that level.
- A change writes at the chosen level, so the value is then set there.
- A setting that the chosen level cannot hold shows its value, but you cannot edit it. Choose a level that can hold it.
An app with one level shows no Write to and no Source column. For the levels of Construct, see Where Construct settings live.
Show more columns
Name, Value, Default and the reset buttons show by default. Source shows by default in an app with more than one level.
- Right-click a column header.
- Check the columns you want: Effective, Source, Range, Unit, Description or Id.
- Drag the edge of a header to make a column wider or narrower.
To go back to the default columns, right-click a header and click Reset columns. The window remembers the columns, its size and its position for each app.
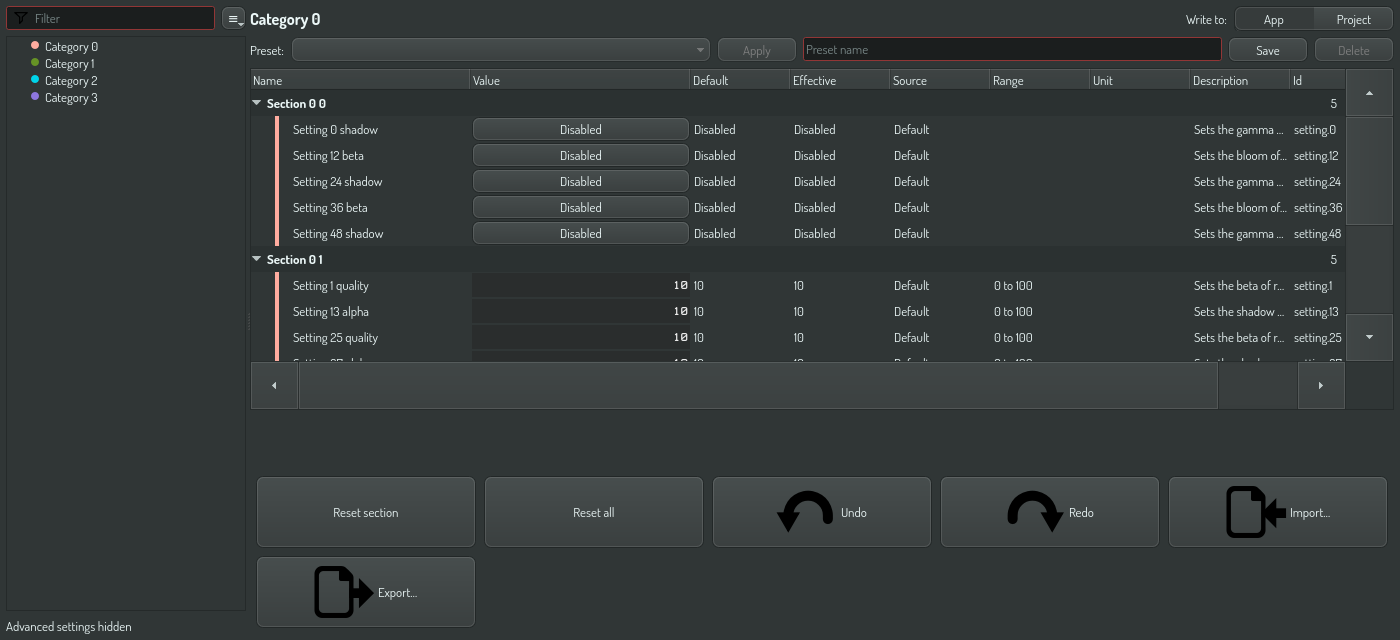
Effective shows the value the app uses now, through every level. It differs from Value only when a higher level overrides the level you chose, for example a camera that overrides the scene.
See also
- Reset, revert and undo
- Settings reference
- Config OPAL tasks — the same changes from a plan or a language model.