Calibrate Servo
Fine-tune servo positions and limits
Calibrate Servo
Fine-tune servo motor positions, limits, and mechanical center points.
Pro Tip
Always leave a 5-10° safety margin from mechanical limits. Servos that hit hard stops generate high current draw and can damage the motor, gears, or connected structure.
Why calibrate?
Servos need calibration because:
- Mechanical tolerances - Each servo is slightly different
- Mounting offsets - Physical installation affects center point
- Safety limits - Prevent damage from over-rotation
- Accurate control - Ensure 90° actually means 90°
Prerequisites
- Servo added to Agent (see Add Actuator)
- Agent running with controller connected
- Physical access to the robot
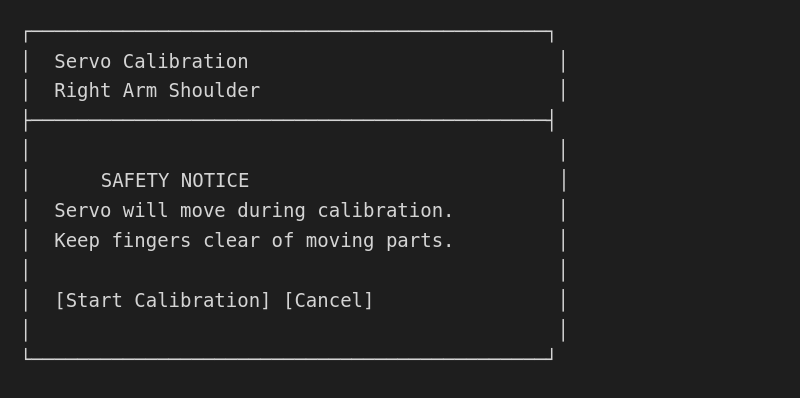
Step 1: Enter calibration mode
On the Agent:
- Open ☰ Menu → Settings
- Go to Hardware → Actuators
- Select the servo to calibrate
- Tap [Calibrate]
Step 2: Find mechanical center
First, establish the true center position:
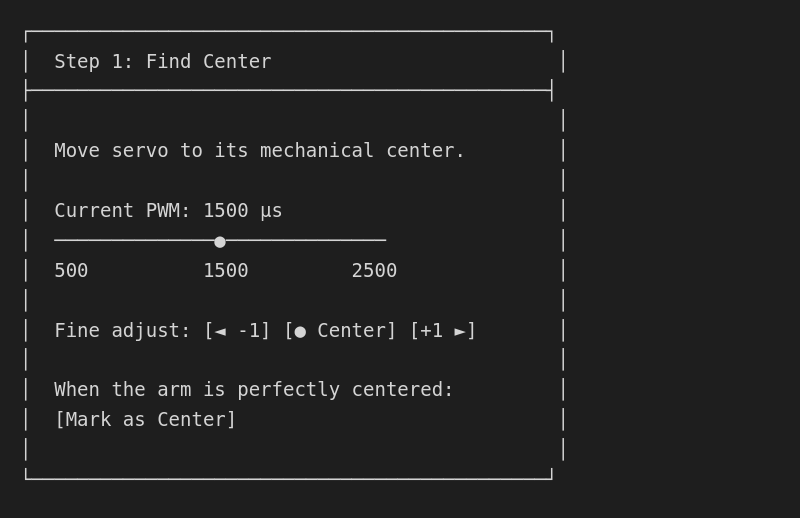
Finding true center
- Move slider until the physical arm is at its center position
- For robot arms: usually perpendicular to body
- For pan/tilt: usually straight ahead
- For continuous rotation servos: where motor stops
Step 3: Set minimum limit
Find the safe minimum position:
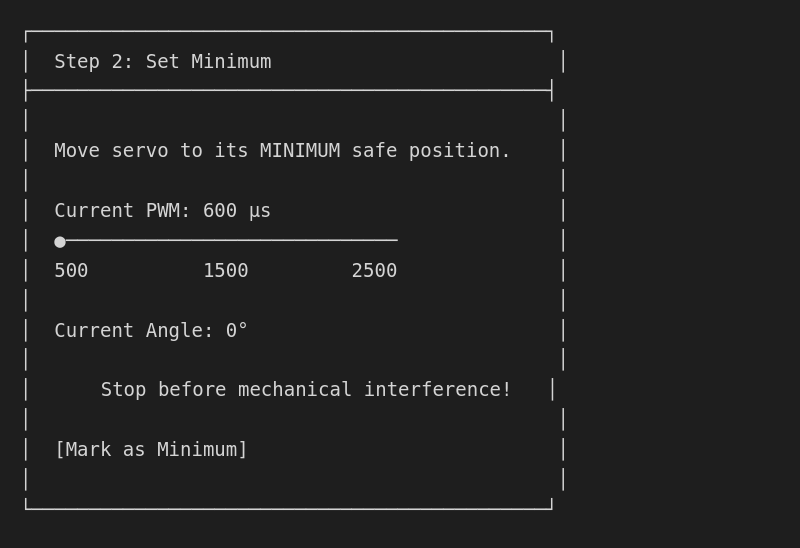
Setting safe minimum
- Slowly decrease PWM value
- Watch for mechanical limits (collision, strain)
- Stop before hitting hard limits
- Leave ~5° margin for safety
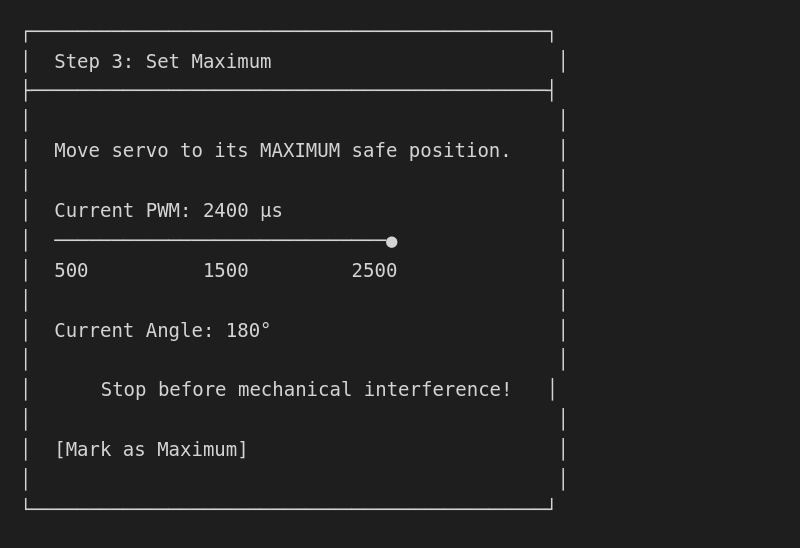
Step 4: Set maximum limit
Find the safe maximum position:
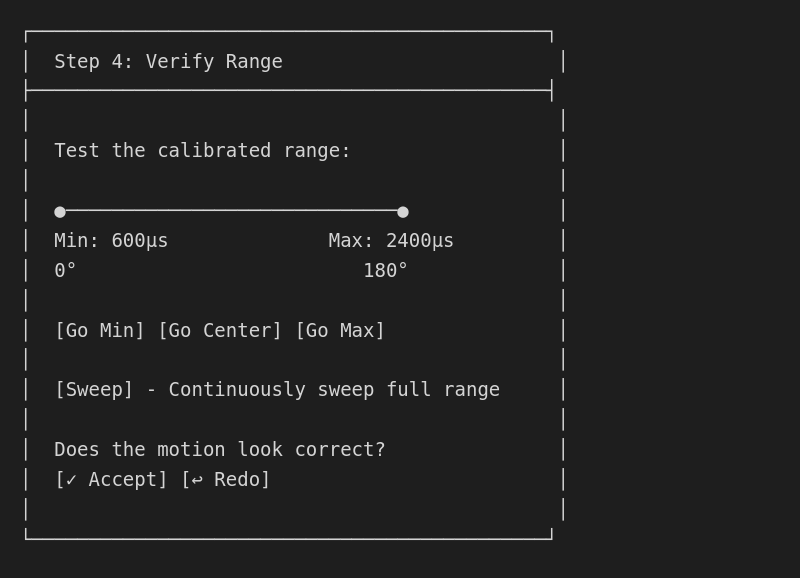
Step 5: Verify range
Test the full range of motion:
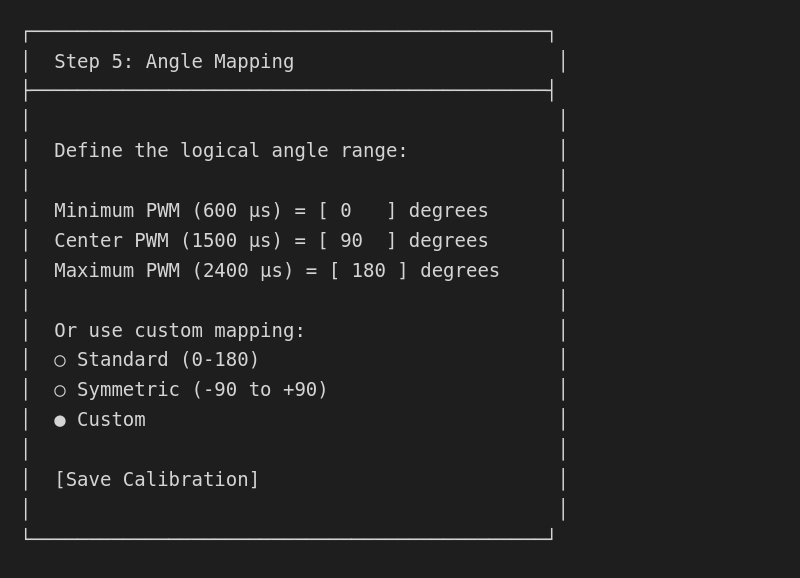
Step 6: Set angle mapping
Map PWM values to logical angles:
Common angle mappings
| Use Case | Min | Center | Max |
|---|---|---|---|
| Standard servo | 0° | 90° | 180° |
| Symmetric pan | -90° | 0° | +90° |
| Limited tilt | -45° | 0° | +45° |
| Gripper | 0° (closed) | - | 60° (open) |
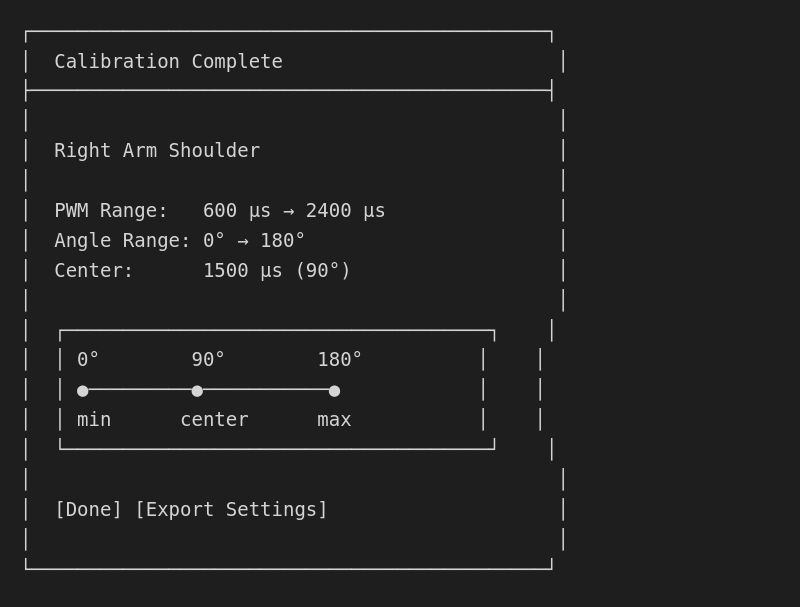
Calibration summary
After calibration:
Calibrating multiple servos
Sequential calibration
Calibrate each servo individually for precision:
- Start with base/root joints
- Move outward to end effectors
- Lock calibrated joints during later calibration
Calibration order for robot arm
| Order | Joint | Notes |
|---|---|---|
| 1 | Base Rotation | Mount arm vertical for this |
| 2 | Shoulder | Rest arm on support |
| 3 | Elbow | Shoulder at 90° |
| 4 | Wrist | Arm extended |
| 5 | Gripper | Last, least critical |
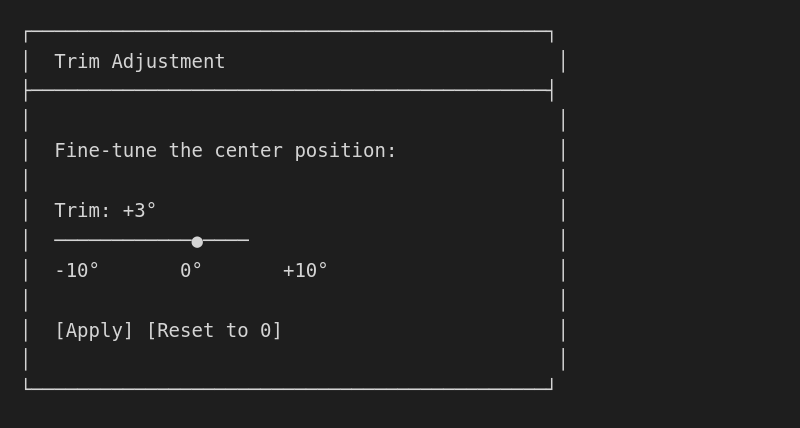
Trim adjustment
For minor adjustments after initial calibration:
- Open actuator settings
- Tap [Trim]
- Adjust the center offset
Troubleshooting calibration
Servo won't move during calibration
- Power issue - Check power supply
- Connection - Verify controller connection
- Pin conflict - Check no other software uses the pin
Servo moves erratically
- Power supply - Use dedicated servo power
- Ground loop - Common ground between controller and servo power
- PWM frequency - Standard servos need 50Hz
Center doesn't match physical center
- Servo horn offset - Remove and reattach horn at center
- Gear slippage - Check for worn splines
- Use trim - For minor misalignment
Range seems limited
- PWM limits - Some servos need 400-2600µs
- Mechanical binding - Check for obstructions
- Servo specification - Some servos are <180°
Calibration data storage
Calibration is saved in:
~/.local/share/OctoMY™/OctoMY Agent/<personality>/hardware.json
Example calibration data:
{
  "actuators": [
    {
      "name": "Right Arm Shoulder",
      "type": "servo",
      "pin": 3,
      "calibration": {
        "minPwm": 600,
        "maxPwm": 2400,
        "centerPwm": 1500,
        "minAngle": 0,
        "maxAngle": 180,
        "trim": 3,
        "inverted": false
      }
    }
  ]
}
Backup and restore
Export calibration
# Copy calibration to backup
cp ~/.local/share/OctoMY™/OctoMY\ Agent/MyRobot/hardware.json \
   ~/octomy-calibration-backup.json
Restore calibration
# Restore from backup
cp ~/octomy-calibration-backup.json \
   ~/.local/share/OctoMY™/OctoMY\ Agent/MyRobot/hardware.json
Transfer to another robot
Same model robots can share calibration:
# On source robot
scp hardware.json user@target:~/

# On target robot
cp ~/hardware.json ~/.local/share/OctoMY™/OctoMY\ Agent/NewRobot/