Add Actuator
Connect motors and servos to your Agent
Add Actuator
Connect motors, servos, and other actuators to your OctoMY™ Agent.
Security Consideration
Always test new actuators at low power settings first. A misconfigured motor can move unexpectedly at full speed - secure the robot or detach moving parts until you've verified the configuration is correct.
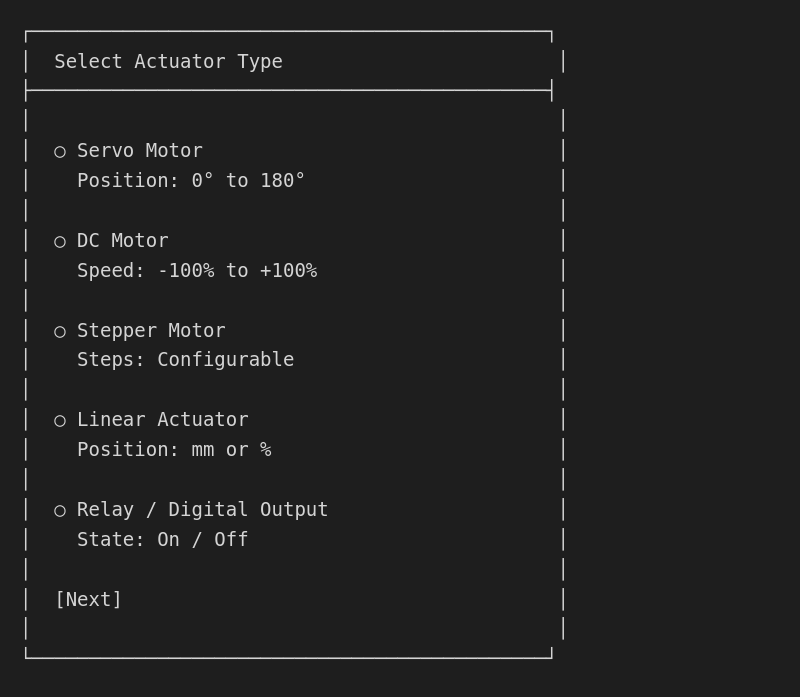
Actuator types
OctoMY™ supports various actuator types:
| Type | Description | Use Case |
|---|---|---|
| Servo | Position-controlled motor | Arms, grippers, pan/tilt |
| DC Motor | Speed-controlled motor | Wheels, continuous rotation |
| Stepper | Step-controlled motor | Precise positioning |
| Linear | Linear actuator | Lifts, sliders |
| Relay | On/off switch | Lights, pumps |
Prerequisites
- Agent running with ArduMY controller connected
- Controller configured (see Configure Controller)
- Actuator hardware and wiring ready
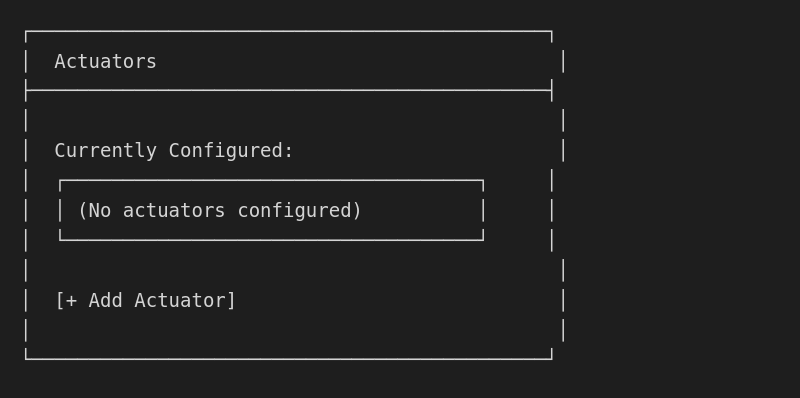
Step 1: Open hardware configuration
On the Agent:
- Open ☰ Menu → Settings
- Go to Hardware → Actuators
- Tap [Add Actuator]
Step 2: Select actuator type
Choose the type of actuator you're adding:
Step 3: Configure pin assignment
Select which controller pin the actuator is connected to:
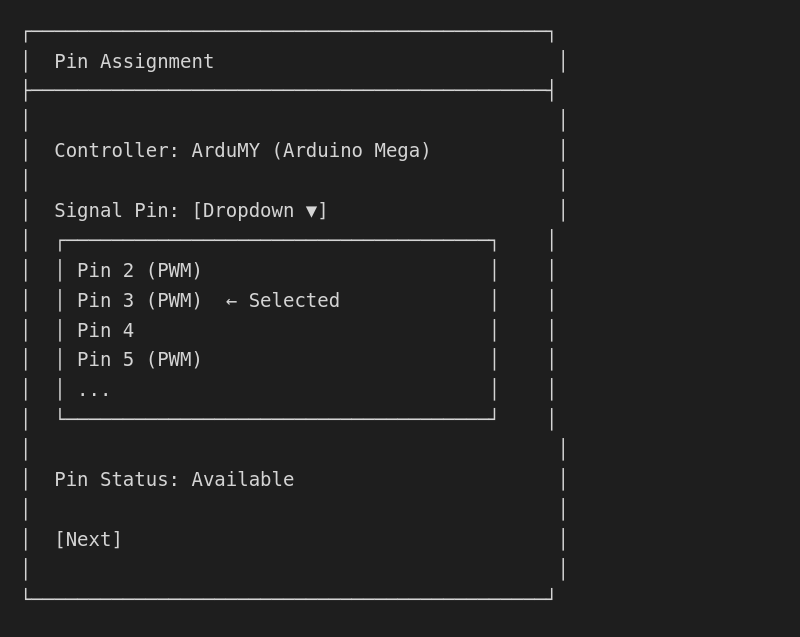
Pin requirements by type
| Actuator Type | Pin Type | Notes |
|---|---|---|
| Servo | PWM | Needs 50Hz PWM signal |
| DC Motor | PWM + Direction | 2 pins for H-bridge |
| Stepper | 4 Digital | Step, Dir, Enable, etc. |
| Relay | Digital | Any GPIO |
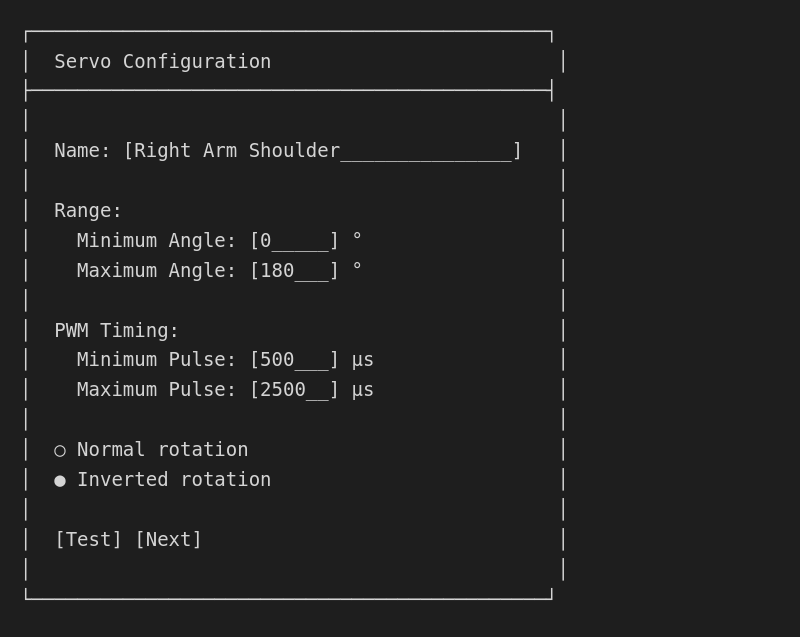
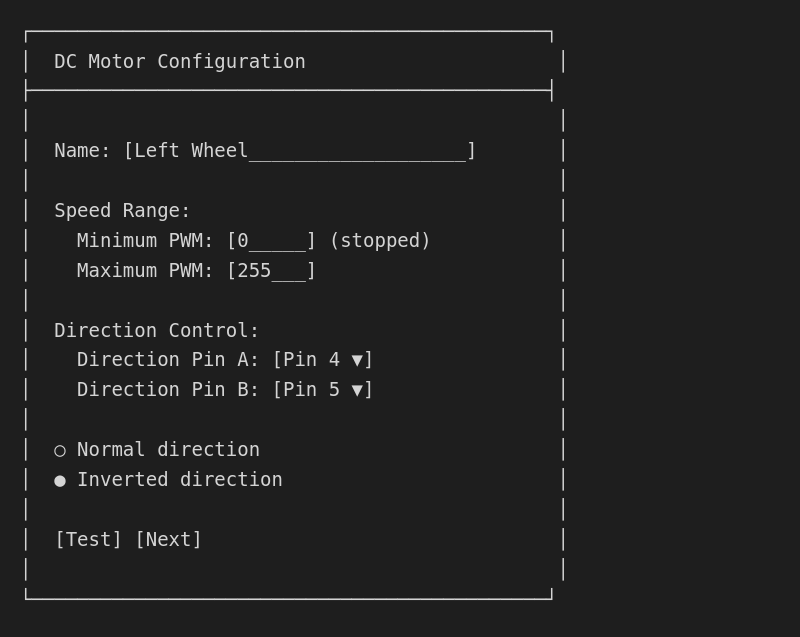
Step 4: Set physical properties
Configure the actuator's physical characteristics:
For servo
For DC motor
Step 5: Test the actuator
Before saving, test the actuator:
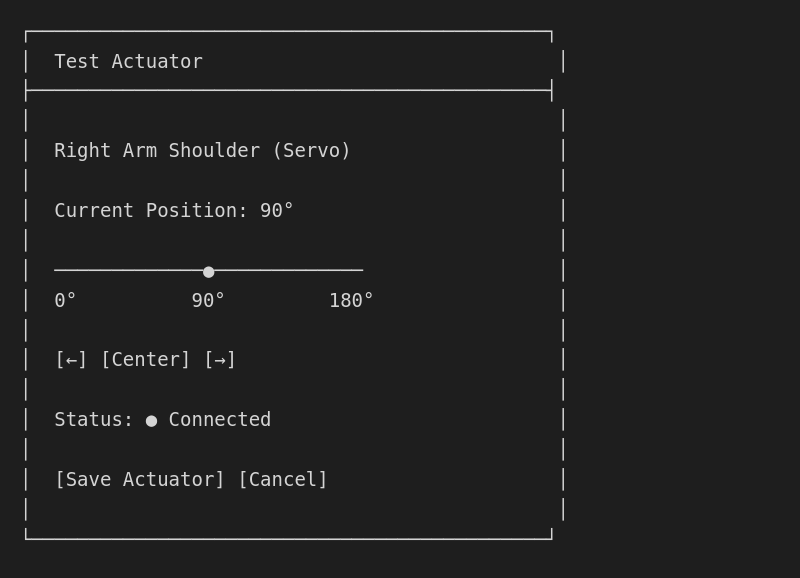
Move the slider or tap the buttons to test movement.
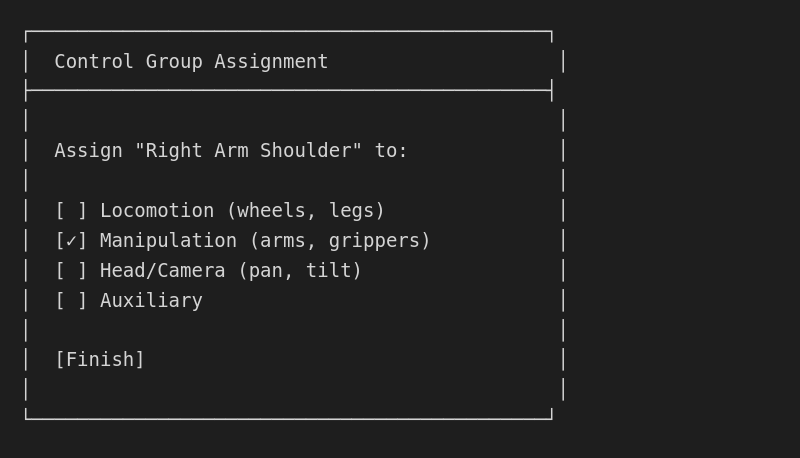
Step 6: Assign to control group
Organize actuators into logical groups for control:
Common actuator setups
Differential drive robot
Two DC motors for tank-style steering:
| Actuator | Pin | Group |
|---|---|---|
| Left Motor | PWM 3, Dir 4/5 | Locomotion |
| Right Motor | PWM 6, Dir 7/8 | Locomotion |
Robot arm
Multiple servos for articulated arm:
| Actuator | Pin | Range |
|---|---|---|
| Base Rotation | PWM 2 | 0-180° |
| Shoulder | PWM 3 | 30-150° |
| Elbow | PWM 4 | 0-180° |
| Wrist | PWM 5 | 0-180° |
| Gripper | PWM 6 | 10-60° |
Pan-tilt camera
Two servos for camera aiming:
| Actuator | Pin | Range |
|---|---|---|
| Pan (horizontal) | PWM 9 | 0-180° |
| Tilt (vertical) | PWM 10 | 45-135° |
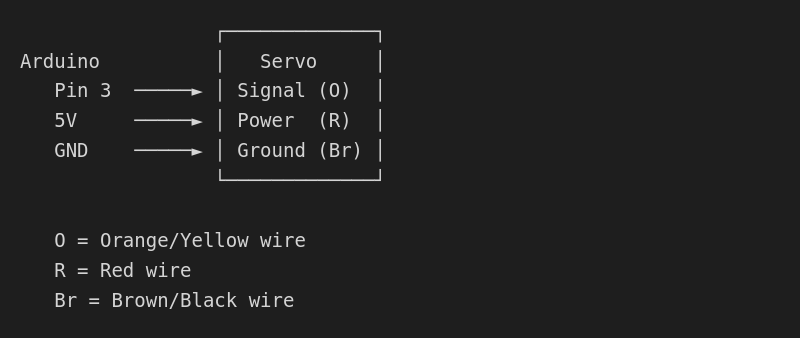
Wiring diagrams
Servo wiring
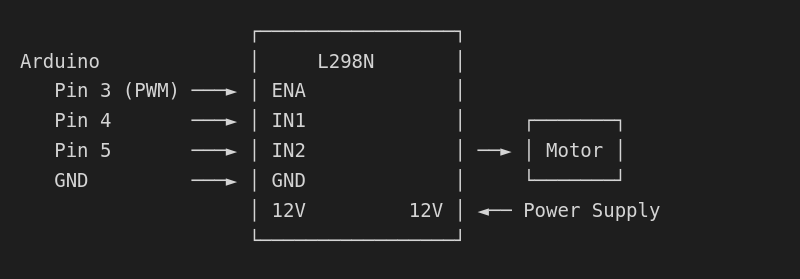
DC motor with L298N
Troubleshooting
Servo not moving
- Check power - Servos need 5-6V, high current
- Check signal pin - Must be PWM capable
- Check PWM timing - Adjust min/max pulse width
- Test with different servo - Rule out hardware fault
Motor runs wrong direction
- Swap direction pins - Exchange Pin A and Pin B
- Use "Invert" option - Toggle in configuration
- Check wiring - Motor leads may be swapped
Actuator jitters
- Power issue - Add capacitor, improve power supply
- Signal noise - Shorter wires, twisted pairs
- Feedback loop - Reduce update frequency
"Pin already in use" error
- Check no other actuator uses that pin
- Release pin from previous configuration
- Restart Agent after removing old config
Advanced: Direct ArduMY configuration
For programmatic control, actuators are defined in the hardware config:
{
  "actuators": [
    {
      "name": "Right Arm Shoulder",
      "type": "servo",
      "pin": 3,
      "min": 0,
      "max": 180,
      "minPulse": 500,
      "maxPulse": 2500,
      "inverted": true,
      "group": "manipulation"
    }
  ]
}
Location: ~/.local/share/OctoMY™/OctoMY Agent/<personality>/hardware.json