Inheriting and overriding settings
Reading the Source column, creating an override, and putting it back
Inheriting and overriding settings
A scene sets a look. A camera can disagree. This page shows how to read which is happening in the settings window, and how to change it.
Open the settings window with the gear button in the toolbar, or with Ctrl+,.
Choose the level
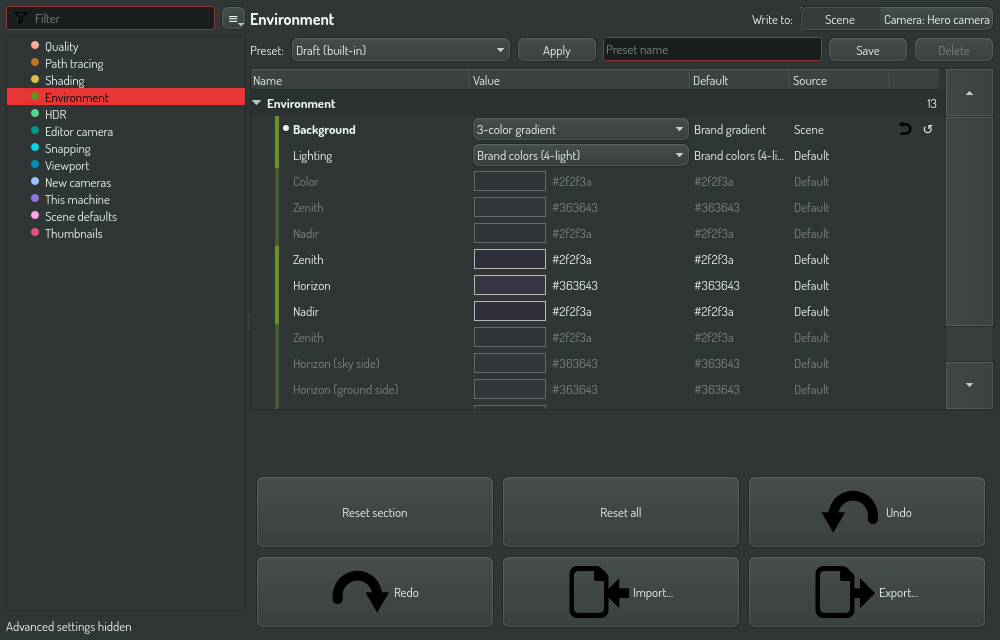
Write to above the table chooses the level you look from and write to:
- New scenes — the template that new scenes start from.
- Scene — the open scene.
- Camera: ‹name› — the camera the viewport looks through. The segment is there only while the viewport looks through a camera.
Read a row
Each row shows its value as seen from the chosen level:
- Dimmed value, Source naming another level — the row is inheriting. The value is set at a lower level, and passes down to the level you chose.
- Full-strength value, Source naming the chosen level, revert button — the row is overridden. The value is set at this level.
Default in the Source column means that no level sets the value. It is
the value Construct ships with.
Create an override
Choose the level in Write to, then change the value. The value goes to full strength, Source names the chosen level, and the revert button shows.
From then on the row has opted out. Change the value at the lower level and this row does not follow.
Put it back
Click the revert button of the row. The override is removed, and the row inherits again: dimmed, with Source naming the level the value comes from now.
This is not the same as typing the inherited value back in. Typing it leaves an override that happens to match. When the lower level changes, your row stays behind. A revert removes the override, so the row follows again. Reset is not a revert either: it writes the default at the chosen level, which is an override too. See Reset, revert and undo.
A worked example
You are lighting a product shot, and the viewport looks through the camera Main.
- In Write to, choose Scene. Open Environment and set Background to Brand gradient. Every camera in the document picks it up.
- In Write to, choose Camera: Main. Set Background to
Physical sky. The Source column now says
Camera, and the revert button shows: this camera has opted out. - Choose Scene again and change the background once more. Every camera follows except Main.
- Choose Camera: Main and click the revert button of Background. The camera rejoins, and shows the scene's new background at once.
To work on another camera, look through it in the viewport. The camera segment follows the viewport.
When there is no camera to override with
In free-orbit editor mode you are not looking through a camera item, so Write to has no camera segment. Rows resolve at the scene.
This matters because what you see is what you render holds strictly when you look through a real camera. In free-orbit mode the viewport shows the scene's settings. That is what a camera that overrides nothing renders, but not what an overriding camera renders.
Undo
A change at Scene or Camera is a step in the document's undo history. Ctrl+Z in the main window takes it back, and so does Undo in the settings window.