The paint workbench
Where everything lives: the merged tool palette and its tabs, the bins that hold your presets and stamps, and the wheel chords that adjust any stroke parameter without leaving the canvas.
The tool palette
The paint surface has one palette window with two tabs:
- Stroke — the stroke parameter grid (Low/High/Val cells, the per-input modulation matrix, the live input row), colour, blend mode, and the stroke preview.
- Tools — everything about what you paint with, in sections: the stroke-operation buttons with their mode bar, the engine picker (Analytic / Sequential / Stamp — see Stroke engines), the operation-parameters area that follows the active mode (paint options, the stamp bin, the selection buttons), the preset bin, and the under-cursor inspector.
The palette header carries the canvas selector and collapses into a single merged bar. While a stroke is active the palette fades out so it never sits between you and the ink; it fades back on pen-up. To change how far it fades, or to turn the fade off, set Palette opacity while drawing in the paint settings (1 turns the fade off).
The polygon tool (Line in fill mode)
In any non-outline mode the Line operation becomes a multi-click polygon: every click places a vertex, the preview live-shows the shape (a rubber line after the first click, the filled/marked polygon from the third vertex on), and the shape auto-closes from the last vertex back to the first. Finish it with a double-click, Enter, or the right mouse button (which returns to being the eraser once no polygon is open); Esc cancels. Switching tool, mode, or canvas mid-polygon cancels the gesture — only closing commits.
The under-cursor inspector
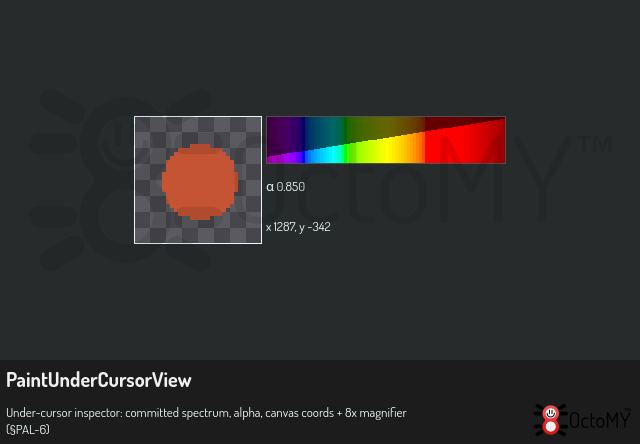
The Tools tab ends with an inspector group showing the committed pixel under your cursor: its full 80-band spectrum, its alpha, its canvas coordinates, and an 8× magnifier patch. It freezes (dimmed) while a stroke is live and resumes on pen-up.
Bins
Presets and stamps live in bins — reorderable tile grids with the same drag behaviour everywhere:
- Stroke bin (Tools tab) — saved stroke presets with engine-aware thumbnails. Click applies; drag reorders; the row label shows the preset's engine and blend.
- Stamp bin (Tools tab, Stamp mode) — regions you captured from the canvas (see Selection & stamps). The current stamp is what the Stamp engine paints with.
Wheel chords
Hold a chord key and roll the wheel to adjust stroke parameters in place — the canvas keeps the pointer, nothing steals focus:
- Named chords adjust a specific parameter (Diameter, Opacity, Hardness, …) no matter where its row currently sits in the grid.
- Digit chords adjust the N-th visible row in your current row order — reorder the grid and the digits follow.
- Tap the chord key instead of holding it and it acts as a normal shortcut — the dispatcher arbitrates tap vs hold.
While a chord is held the grid highlights the targeted row and the Low/High header, so you always see what the wheel is about to change. One notch moves the cell by ten grid steps; smooth wheels scale fractionally.
The Shortcuts… button above the canvas lists every key and chord of the canvas, and lets you give a key shortcut another key. See Change a keyboard shortcut.
See also
- Stroke engines — Analytic, Sequential and Stamp.
- Expression columns — formula-driven stroke inputs.
- Selection & stamps — constrain painting to a region; grab regions as stamps.