Named Areas (Paint)
Quick reference rectangles on the canvas with one-click image import/export. Save a region to a PNG, paint somewhere else, then load it back — or load a reference image into a defined region and paint over it.
What a named area is
A named area is a pixel-aligned, axis-aligned rectangle on the paint canvas that the application remembers across sessions. Each area carries:
- a unique uuid — internal id (you never type it)
- a user-given name — anything; must be unique within the registry
- a rect — top-left
(x, y)pluswidth × height, all integers - an optional input path — a file Load reads from
- an optional output path — a file Save writes to
The input and output paths can be empty, the same (round-trip), or different (load from one file, save to another).
Areas live in QSettings — they are global to the user, not stored in any one document. Use them for region presets you'll reach for across multiple sessions.
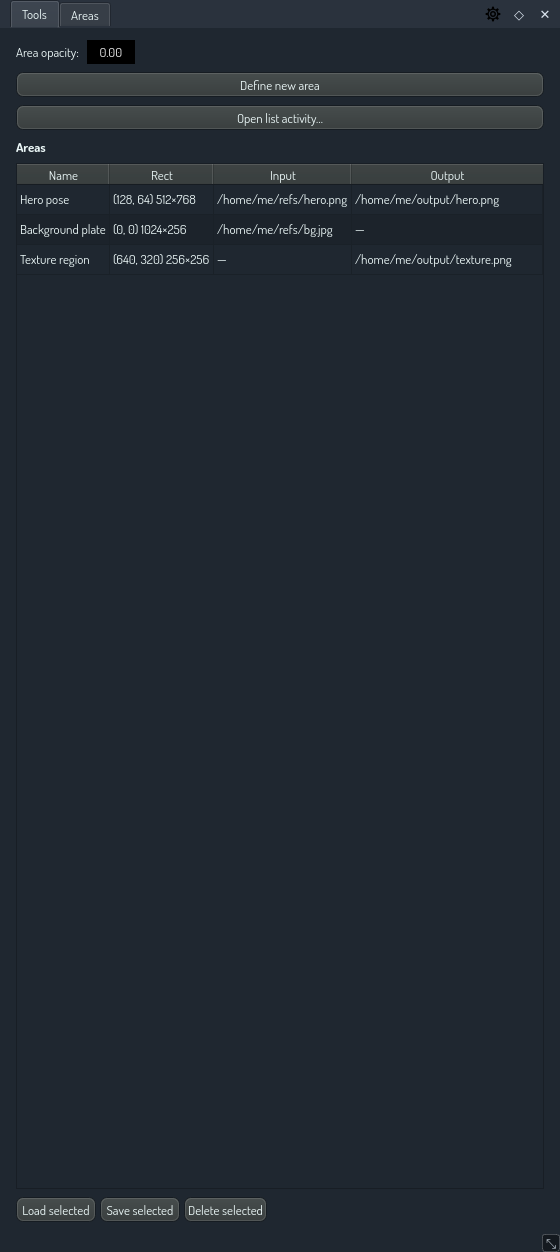
Defining an area on the canvas
The fastest way to make an area is to drag it on the canvas:
- Open the brush panel (right-click on the canvas, or press Space).
- Switch to the Areas tab.
- Click Define new area (or press the A shortcut).
- Drag a rectangle on the canvas. The corners snap to integer canvas
pixels; a dashed yellow preview with a live
W × Hreadout shows the rectangle as you draw. - Release the mouse / lift the stylus. A name prompt opens with a
suggested default (
Area 1,Area 2, …). Type a name and accept.
The area appears as a thin light-gray frame on the canvas (toggle Show areas off if you'd rather not see frames) and as a new row in the Areas table.
Saving canvas pixels to a file (export)
- Select one or more rows in the Areas tab table (Ctrl-click or Shift-click for multi-select).
- Click Save selected.
- For any area that doesn't already have an output path, a file
dialog opens. Pick a destination (e.g.
~/Pictures/hero.png). The file format is inferred from the extension —.png,.jpg,.tiff,.bmp, and.webpall work. - The chosen path is remembered: clicking Save selected again later writes straight to the same file without prompting.
Save reads the canvas's CPU-side spectral mirror, converts each pixel
through the standard sRGB encode, and writes a Format_RGBA8888
image. If you save immediately after a brush stroke, the application
briefly waits for the GPU → CPU readback to drain before writing, so
the file always reflects the most recent paint.
Loading an image into an area (import)
- Select one or more rows.
- Click Load selected.
- For any area that doesn't already have an input path, a file dialog opens. Pick an image file. The chosen path is remembered.
Load decodes the image, normalises it to RGBA8888, scales to fit the
area's rect (Qt::IgnoreAspectRatio), and deposits the pixels through
a LoadAreaOperation. The deposit goes through the normal paint-
history pipeline, so Ctrl+Z undoes a load
the same way it undoes a brush stroke.
If the source image's aspect ratio doesn't match the area's rect, the image stretches to fit. To avoid this, use the Match area aspect to input image button in the area editor (see below) before loading.
Managing the full list
For richer edits — renaming, changing the rect, adjusting paths without using a Save/Load dialog, deleting — open the dedicated list activity from the Areas tab's Open list activity… button.
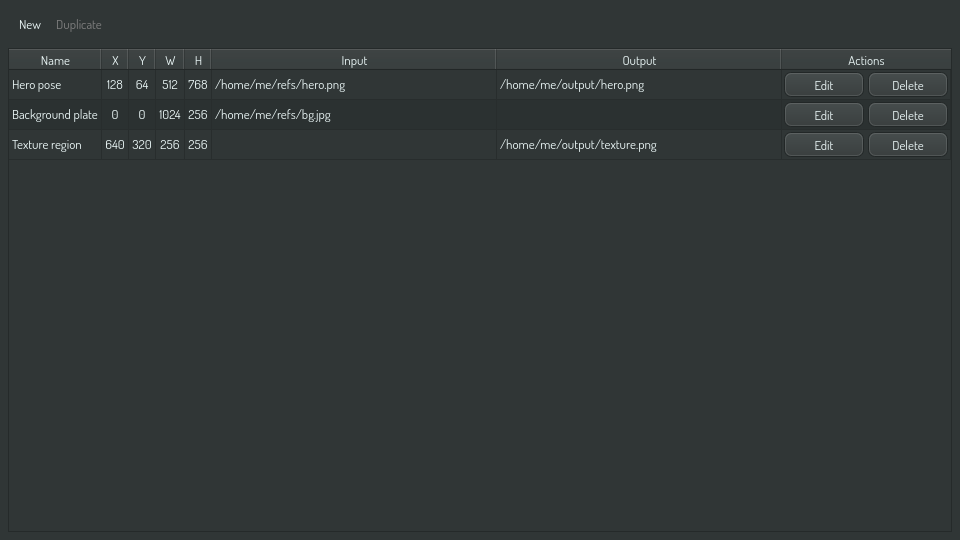
In the list:
- Double-click any cell to edit it in place. Names, x / y / w / h spin boxes, and input/output paths are all editable from the row.
- Edit button on a row opens the full editor activity, with Browse buttons for the paths and the Match area aspect to input image helper.
- Delete button on a row opens a confirm activity. Cancel leaves the area alone; confirm removes the registry entry. Canvas pixels are not affected.
- New in the toolbar creates a fresh area starting at
(0, 0) 256 × 256and pushes the editor. - Duplicate in the toolbar clones the currently-selected row
under a unique name (e.g.
Hero pose-2).
When the canvas overlay is on, the row you have selected renders with a thick white frame on the canvas instead of the default light gray, so you can see exactly which rectangle the row corresponds to.
Keyboard shortcuts
| Action | Shortcut |
|---|---|
| Open the SelectArea tool (drag to create) | A |
| Toggle the brush panel | Space |
See also
- Area settings reference — the QSettings schema, useful if you want to script area creation outside the app.