Make a worker farm
A farm is a set of machines that run batch jobs for one coordinator: the hub you work from. A worker is a hub too, usually run with no screen. It takes the job types you let it take, runs them in a folder of its own, and sends the results and their files back. Your hub keeps the queue, the results and every file, wherever the job ran.
You can make a farm two ways, and mix them:
- Pair a machine you own. A second desktop, a server in a cupboard.
- Let the fleet buy machines. It rents them from a cloud provider, as they are needed, within a spend limit you set.
Pair a machine you own
- Run a hub on it, and pair it with your hub as you pair any node. Only a paired machine is ever given work.
- On the worker, say which job types it takes, with the task
batch.node.offer, for exampleconstruct.mesh. A worker always offers the debug workloads,debug.*, too. - On your hub, say which job types it sends away: the node setting
batch/remote/forwarded-types, for exampleconstruct.mesh. - Choose how much of the worker's machine a job may take, with its node mode: Background on a desktop someone uses, Drone on a machine that exists to run jobs.
Placement decides where each job runs: on your hub, or on a worker that offers its type and has room. You submit a job the same way either way.
Let the fleet buy workers
Set the fleet up first: Rent machines to run the work. Then set its job types, which
every machine it buys takes, on the fleet's settings screen or with fleet.configure. A machine the
fleet buys runs in Drone mode.
Set the pool
The pool says how many machines the fleet keeps:
| Field | Means |
|---|---|
| at least | Machines kept whatever the demand: a standing farm |
| at most | Machines the fleet may buy for jobs that wait |
| drain idle after | How long a machine above the floor may hold no job before it goes |
Set it on the Fleet screen and click Set pool, or run fleet.pool:
{"task": "fleet.pool", "args": {"minWorkers": 0, "maxWorkers": 3, "idleDrain": 600}}
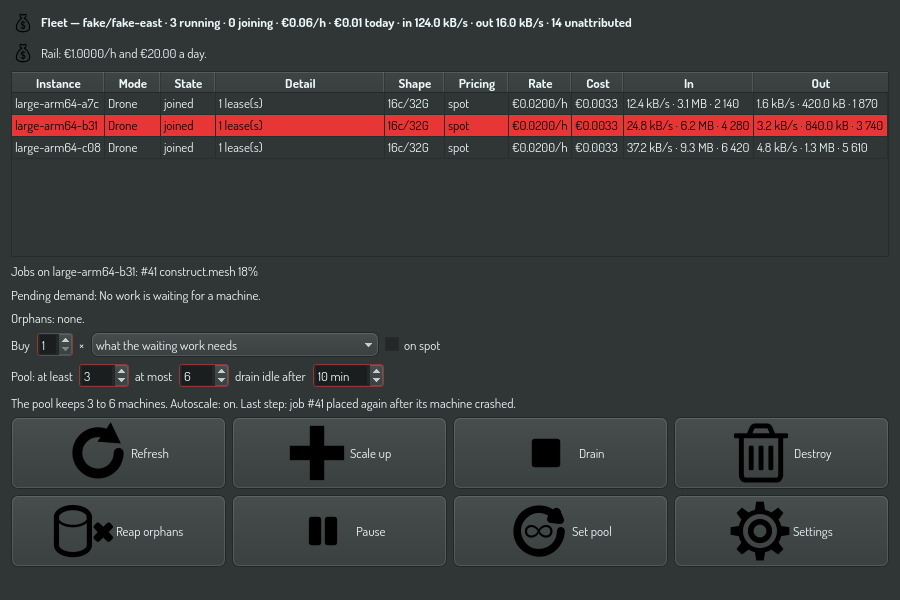
Then grant the permission fleet.autoscale on the Permissions screen. Until you do, the pool is
only shown: nothing buys a machine without you. With it, the pool's loop runs once a minute. It buys
for jobs that wait, up to the ceiling, and keeps the floor. It drains a machine that has been idle
too long and destroys it when its last job is done. Every purchase still passes the spend limits,
and Pause stops all buying.
| Pool | What it does |
|---|---|
| at least 0, at most 3 | Buys up to three while jobs wait, and lets them go when the queue is empty |
| at least 2, at most 2 | Keeps two, always |
| at least 1, at most 5 | One always ready, and up to five when there is work |
| at least 0, at most 0 | No pool. The machines the pool bought drain, and each goes when its last job is done. A machine you bought by hand stays |
Watch the work
- On the Fleet screen, select a machine. The line under the list shows the jobs it holds and how far along each one is.
batch.job.getshows a job that runs on a worker with the worker's latest progress and the last lines of its log. The progress comes from the worker once a second while the job runs.batch.artifact.transfersshows the files on their way between your hub and a worker, and how much of each has arrived. A large file that is cut off continues where it stopped.
If a job waits and does not start, Find out why a job is not running lists what to look at, the reasons a worker gives among them.
Check the farm
The debug workloads make every fault a farm must survive, on demand: a crash, a hang, a corrupt answer, a lost link. Run them against a new farm before you trust it with real work: Check a farm with the debug workloads.
Put it to work
Mesh scenes on a farm runs the first real workload: a scene in, an STL file out, and what one job costs on a rented worker.
Two more job types run on a farm the same way. Add them to the job types you send away:
| Job type | What it does |
|---|---|
study.point |
One design point of a study. study.run queues every point of a sweep as one of these, and study.progress follows them. A point leaves your hub only when every part of the model may run elsewhere and one of them takes longer than about a second; study.run says why when it does not |
fem.solve |
A linear static FEA solve. Inputs: the mesh, mesh.vtk (a tetrahedral volume) or mesh.stl (a surface, which the worker fills with tetrahedra), and the load case, loadcase.json. Outputs: results.vtk for a viewer and results.json per node. Its values hold the largest displacement and stress and the smallest factor of safety |
A load case names the material and where each load acts, by place rather than by node number, because the mesh does not exist yet when you write it:
{
  "material": "aluminum",
  "loads": [
    {"type": "fixed", "where": {"band": {"axis": "x", "side": "min", "fraction": 0.01}}},
    {"type": "force", "where": {"band": {"axis": "x", "side": "max", "fraction": 0.01}}, "value": [0, 0, -100]}
  ]
}
A force is the total, spread over the nodes it selects. where is a box (min, max), a plane
(point, normal, tolerance) or a band at one end of an axis. A load case that holds the part
nowhere, or a load that selects no node, fails the job by name.